
The first step towards building your guitar frame is designing the guitar body. You should start with a basic frame, a piece of wood at least 16 inches long; the width can be whatever you want. Then, cut this frame into whatever shape you want, but leave a 2½ inches column down the center of the piece of plywood:
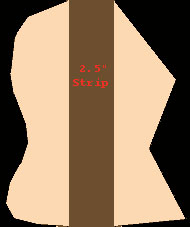
Cutout diagram of guitar body.
The next step is to glue on the neck. We used a prefabricated neck; we glued it on so that it went 8 inches down from the top of the guitar body that we cut out:
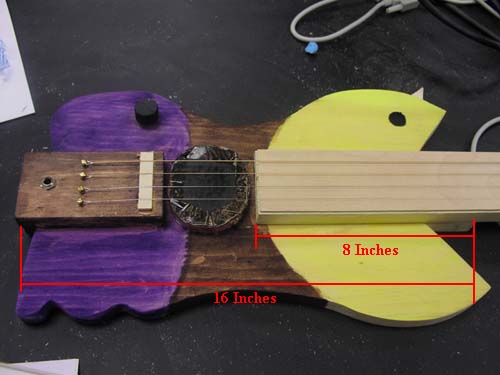
Guitar body with neck measurements shown.
It should be centered on the 2½ inches column that you left earlier.
As you can see, there are two other pieces glued onto the front of the guitar. One is the pickup; you will build this in the next section of the lab. The other is the tailpiece; it is where you anchor the strings, and where you will eventually plug in the audio cable for your guitar. This is how you will build the tailpiece:
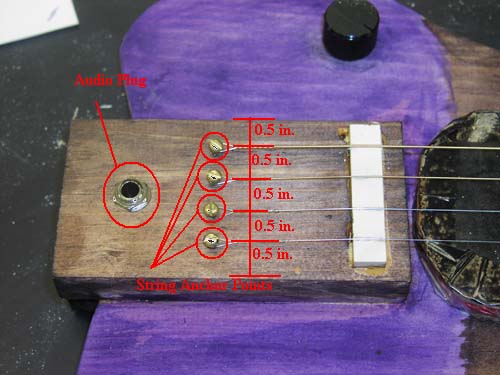
Tailpiece of guitar with string spacing measurements.
Screw in brass screws 2 inches in from the bottom of the tailpiece, a 5 x 2½ inches piece of wood, in the pattern described in the picture above. Flip the tailpiece over, and drill a hole for the guitar plug (which you will have to go out and buy somewhere; it's a generic ¼ inches jack plug) 1 inch from the bottom of the tailpiece.
While you're drilling, you may want to drill a hole in the bottom of your guitar for your volume knob. The volume knob can be anywhere on your guitar, but make sure that it won't be in your way while you're playing the guitar. The volume knob is a standard potentiometer, of a size big enough that you can comfortably turn it; knobs for these potentiometers are often sold separately.

Close-up of the volume knob.
Back to the ¼ inches jack: To finish it off, solder wires onto both the ground lead and the mono audio lead on the jack, and cut slots in the tailpiece so that the wires can run straight out of the bottom of the guitar. Then, take the washer and nut off of the jack, put the remainder of the jack into its hole, and screw the washer and nut back into place (and tighten the screw down really well; it's almost impossible to tighten it after gluing). Run the wires out of their slots and glue the tailpiece into place, and you're done with the tailpiece.
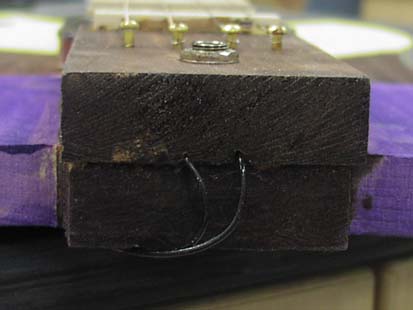
Close-up of tailpiece and bottom of guitar.
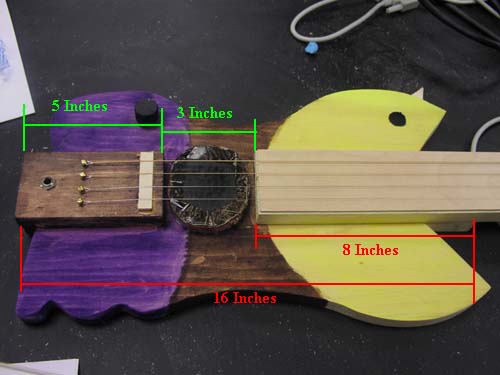
Guitar body with neck and body measurements shown.
Now that you've glued all the pieces in place, there's one last step: Attaching the tuning knobs:
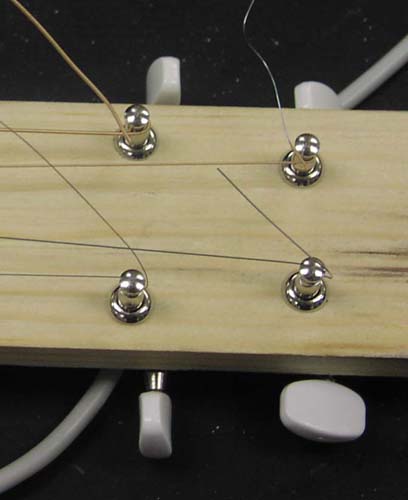
First, hammer in the bearing pieces, into the top side of your guitar. Then, slide the tuning knobs through the bearings from the back, so that the string, running across the top of the guitar, can slide into the holes in each of them, and screw them in place. Make sure that you can rotate the knobs entirely around; if they hit the neck, move them so they can be twisted fully, or else they won't be able to tighten the string, and thus won't be able to function.
Now you have finished with the body of your guitar; feel free to paint or decorate it however you want, as long as you don't interfere with the path of the strings, which will eventually rest roughly a third of a centimeter up off of the surface of the neck. You may choose to glue a thin strip of wood over the neck of the guitar so that the "action", the distance that you have to push the strings down until they reach the neck, is smaller; do this after the nut blank section.
The next step is to build your pickup; click here to see how to do so.