WARNING NOTICE:
An activity described in this course is potentially hazardous and requires a high level of safety training, special facilities and equipment, and supervision by appropriate individuals. You bear the sole responsibility, liability, and risk for the implementation of such safety procedures and measures. MIT shall have no responsibility, liability, or risk for the content or implementation of any of the material presented. Legal Notice
During lab periods, students build their own Geiger counter, and then characterize their counter, the background radiation in the room, and its shielding properties, using the tools and software described below.
Building the Geiger Counter
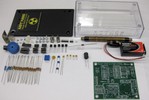
The MIT students enrolled in this class were given a kit containing all the parts required to build their Geiger counter, and a set of detailed instructions.
- Parts list (choice of two file formats): Bill of Materials (XLS), Bill of Materials (PDF) (Courtesy of Mark Chilenski. Used with permission.)
- Instructions to build your Geiger-Müller Counter (PDF - 5.2MB) (Courtesy of Mark Chilenski. Used with permission.)
-
 Geiger Counter schematic diagram (PDF - 1.1MB) (Courtesy of Mark Chilenski. Used with permission.)
A soldering iron is also required.
How Can I Obtain the Parts?
OCW cannot provide this parts kit to you directly, but we can offer tips on how to obtain the parts yourself. The Bill of Materials file above lists all of the parts, and the Instructions gives more details about how the parts are used for each step.
- In 2015, the parts would cost $60-$100 US (depending on your source).
- Most parts should be readily available from any electronics retailer.
- The SBM20 Geiger-Müller tube can be purchased on eBay.
- Circuit board fabrication companies can make the board for you, using the specification in these Gerber files (ZIP) (This ZIP file contains: 1 .gbl file, 1 .txt file, 1 .gbo file, 1 .gtl file, 1 .gts file, and 1 .gto file). One such company is Advanced Circuits. Shop for student specials on a single or small number of boards.
- The plastic case is a Serpac 052C, which can be ordered from electronics retailers like DigiKey.
- The case must have holes drilled in its sides, in order to let the beta particles through. While the MIT kit's case was custom machined on a CNC to produce letter-shaped holes, any shape holes in the middle of the sides will do. Refer to these mechanical drawings for guidance on the proper location of the holes:
 top-view drawing (PDF) and
  bottom-view drawing (PDF).
NOTE (July 2015): If OCW users express sufficient interest, the MIT Department of Nuclear Science and Engineering might offer this kit for sale to the public. If you are interested, please let them know by completing this brief web survey.
Tools and Software
Labs use the National Instruments ELVIS II system and MIT-provided software running on a Windows personal computer to collect data about the Geiger counter.
Begin by installing the National Instruments LabVIEW Run-Time engine and NI-DAQmx Run-Time engine. The versions of these programs used during the January 2015 MIT class are linked below.
Note that these programs are updated frequently; consult the NI Hardware Drivers page for the latest versions.
MIT NSE Geiger Data Collection Program
After installing the above National Instruments programs, next install the MIT NSE Geiger Data Collection Program (EXE - 1.8MB) (Courtesy of Matthew D'Asaro. Used with permission.) Detailed instructions for its use are displayed when you run the program.
Please note: This software is provided "as-is," and OCW cannot offer any further technical support.
Technical requirements:
- The software is designed to work with the NI-ELVIS II system. Most likely, it should also work with a wide variety of other NI data acquisition hardware (i.e. the NI-USB-xxxx series), but this functionality is untested.
- The following software environment is required:
- Windows XP or newer
- NI LabVIEW runtime engine 2014 or newer
- NI NI-DAQmx runtime 14.1 or newer
Lab Report
Having built their Geiger counter, each student performed a series of lab tests and activities with it, and wrote up a lab report.
Lab Description and Report (PDF)
Image Gallery
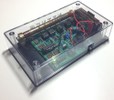
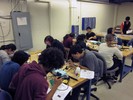
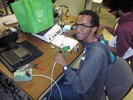
Here are some photos of the Geiger counter kit and students working in the lab.


