| « Previous: student work sample | Next: Return to Assignment 9 description » |
By Dawn Wendell
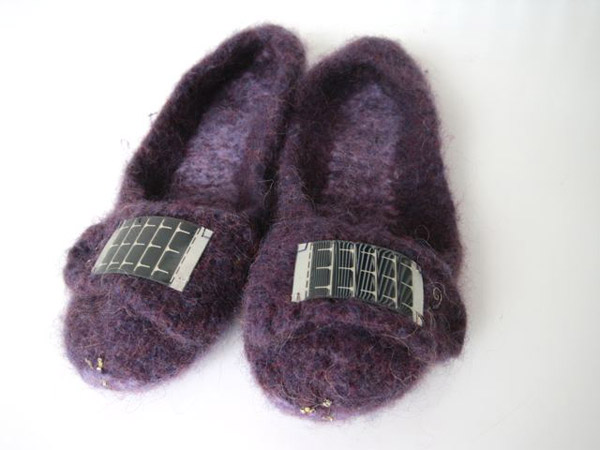
Sneaky Slippers.
For my final project, I wanted to create a pair of whimsical but useful slippers that would light your way as you walked around your apartment at night, without disturbing your roommates. These were the features I wanted:

The Sneaky Slipper concept. (Wool slippers photo © The Wool Shack. (c) The Wool Shack to (c) French Press Knits.)
The project is divided into 2 major parts: the knitting and the electronics.
The Knitting
This was from my work on the Knit, Woven, Embroidery or Print assignment.
The yarn is Istex Lett-Lopi which I received as a gift from a friend who visited Iceland. It is a single-ply yarn so it felts easily. I knit it following the pattern for French Press Felted Slippers from the French Press Knits blog. I knit on gauge with size US15 (metric 10) needles. They were metal and heavy and I hated them. But they worked! I also ran low on yarn so I knit the bottoms with two strands of lighter purple yarn and one strand of the dark purple. It gives the slippers a faux-sole look. Because I have very narrow feet I made the bottoms two stitches narrower throughout in hopes that they would fit better.
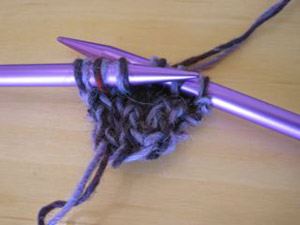
Beginning to knit.
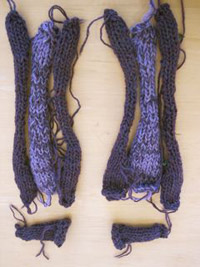
The pattern had 4 pieces per slipper: two sides, the bottom, and the strap. That meant 8 pieces total.
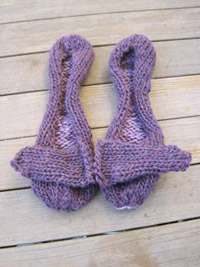
After weaving in the ends and sewing them together, they looked more slipper-like.
Felting was a bit adventurous. The directions said to put the pieces in a pillowcase, tie it shut, and put into the washer on hot water. Agitate and check every 5 minutes. It also said to NOT let it spin, no rinsing. My process wasn't exactly the same. The pillowcase kept coming unknotted so I put everything in a mesh lingerie bag with a zip top. I let it agitate for more than 25 minutes at 5-minute intervals before forgetting to check it so everything went through the rinse and spin cycle. I caught it before the final rinse and looked at the slippers and they had finally felted to size! The nearly-dry state was also a plus for letting it spin.
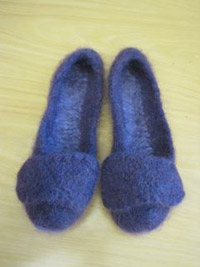
The slippers after felting.
Overall, a very successful knitting and felting experience!
The Electronics
I designed a simple circuit for both charging the battery from a small solar panel and for lighting a trio of LEDs when a pressure sensor was depressed.

The Sneaky Slippers circuit.
Sources: Battery, LEDs, Solar Panel, Diode, Pressure-sensitive rubber (not used on the final product)

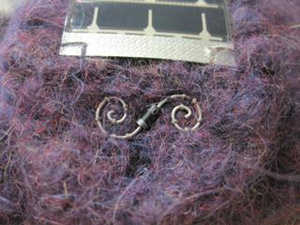
The battery was hidden under the slipper's decorative flap. I cut off the wire connectors and soldered the wire ends into loops for easy sewing. The solar panel and diode was sewed to the top of the flap.

The surface-mount LEDs were turned into LED sequins by soldering on some silver crimp beads for ease of sewing.
My pressure-sensitive rubber order was slow to arrive, so I made a pressure sensor similar to the one from my Soft Circuit assignment (Rescue Bracelet project). I used felt instead of neoprene to try to minimize the height of the sensor. Then I sewed it under the toe area of the slippers.
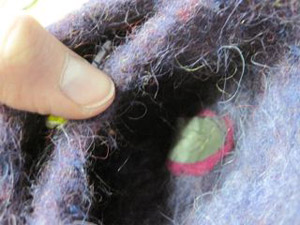
The felt-based pressure sensor.

A top view of the slippers, one with the flap open (showing the battery) and one with it closed (showing the solar panel and the diode).
Finally, I sewed the LEDs onto the slippers and sewed all connections with conductive thread. They didn't work on the first try (I had some shorting issues), but once I rewired the first slipper, they worked like a charm!
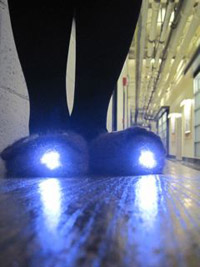
They worked like a charm!
Documentation
Sneaky Slippers.
Success Story
Only 2 days after completing the project, one of my roommates had some French friends come to town to visit. They arrived exhausted and jetlagged, so they went to sleep on the futon in the living room at 9pm. I knew my slippers were a success when my other roommate asked to borrow them so that he could go to the bathroom without having to turn on the hallway light and wake up our guests.
Lessons Learned / Future Ideas
- Making two of something is much harder than making one thing! A pair of slippers was definitely a challenge (twice as much debugging, plus its REALLY obvious if they don't match).
- Insulation in textiles is a real challenge. I had several shorting issues, especially when I tried burying the wires into the felted knitting and I forgot where I put them. Oops!
- The slippers would benefit from a light sensor so that the LEDs don't come on unless it is dark.
| « Previous: student work sample | Next: Return to Assignment 9 description » |
